How to Build a Slanted Shed Roof: Step-by-Step Guide for Beginners
Are you frequently running out of space to store your gardening tools? Or perhaps you yearn for a peaceful extra room nestled in the great outdoors? If your backyard has ample space, why not consider constructing a shed?
Building a shed can offer several benefits.It can range from increasing your storage space to enhancing your property’s aesthetic appeal.
Before commencing your DIY building project, familiarize yourself with local building regulations.
Each building department has its own set of rules in terms of the maximum surface area for a shed that doesn’t require a building permit.
If your shed design exceeds this limit, be sure to apply for a permit to avoid any legal issues down the line.
Once you have all the building regulations and permit details sorted, you can gather the necessary materials and start with your building plan ideas.
Here’s a comprehensive guide on how to build a simple roof shed using various building materials.
What You’ll Need
The materials you’ll need depend on what type of shed you’ll be building and how big you plan it to be. But generally, here’s what you’ll need for a regular shed with a slanted roof:
- Tape measure: This is a fundamental tool for accurate measurements. You’ll need it to mark your shed’s area before construction and ensure all measurements are spot-on.
- Level: As with building any floor or foundation of a structure, you’ll need to make sure everything’s level. This is to prevent water from pooling on one side or stop balls from rolling over to the other side when storing them.
- Timber: The timber size and quantity will hinge on your shed’s design and size. You need to calculate the amount needed for the shed’s walls, floor deck, roof rafters, and foundation.
- Saw: A saw is a necessary tool to cut wood pieces to the correct size, aligning with your stud plan and stud locations.
- Roofing material: This also depends on your preference. But asphalt shingles are great to use since they’re easy to deal with for any skill level. They’re also the most affordable option that gives you great quality for your roofing. Here’s how to measure a roof for shingles.
- Hammer and nails: These are to strengthen your pieces and ensure your structure stays sturdy.
- Vent: Installing vents promotes adequate ventilation and airflow within the shed. It can also help prevent moisture buildup and prolong the shed’s life.
- Siding: Vinyl siding is usually great for use on sheds as it’s cheap but durable. Just make sure you apply it properly so that it lasts long. If you’re unsure how to do it yourself, seek the help of a professional.
- Protective gear: Don’t forget to wear gloves so you can avoid getting splinters. You might also need some goggles to protect your eyes when working.
Roof Installation
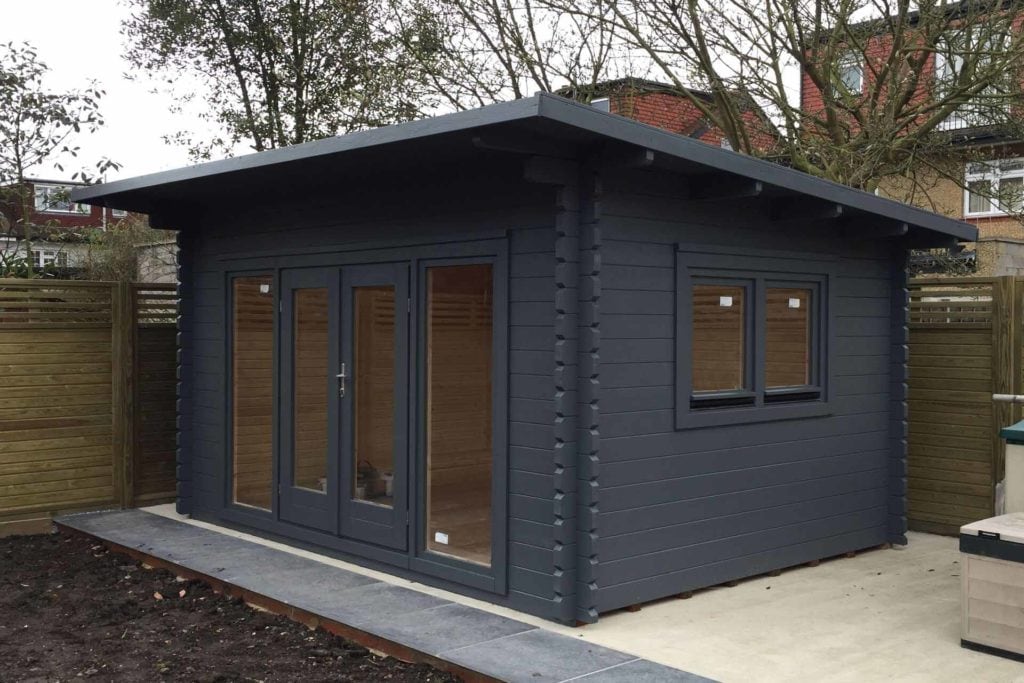
Installing a slanted or sloped roof for your shed can be broken down into manageable steps. Here’s how:
- Build the rafters. The first step in the roof framing process involves constructing the roof rafters, which will hold up the roof material. It’s crucial to evenly space these rafters to ensure structural integrity. Be mindful of roof rafter spacing as it significantly impacts the roof weight distribution and overall strength of the roof.
- Notch and secure the rafters. After building the roof rafters, cut them at an angle to create a notch for the shed’s walls. Then, secure them using hurricane ties.
- Attach a layer of roof felt over your rafters. Over your roof rafters, install a layer of roof felt. This acts as an additional barrier to water, contributing to a watertight roof. Ensure that everything is securely fastened.
- Take out your asphalt shingles and start installing them on your roof. Begin installing your roofing shingles. If you feel uneasy about doing this yourself, consider hiring professionals. Remember that installing roof shingles involves careful consideration of the roof overhang. This is to prevent water damage to the fascia boards.
- Add a vent to the upper sides of the shed. Or you can also install a roof vent if that would be easier for you.
Covering a Slanted Roof
A shed roof is just like any other roof. You also have different options for it.
Depending on your area’s climate, one roofing material may do better than another. And when climate isn’t that big of an issue, choosing a roof for your shed boils down to aesthetics.
Asphalt shingles are widely used for roofing as they’re versatile. They’re also much easier for beginners to install than other roofing materials.
They’re easier to replace, too. If you have a cracked or curled shingle, replacing them won’t take much.
If you live in an area with harsher weather conditions, you might want to consider other roofing materials like metal or slate. These are made to be more durable and last much longer than asphalt shingles.
Metal roofs are more eco-friendly, too.
How Much Does It Cost to Build a Shed With a Slanted Roof?
The cost of building a shed differs greatly depending on its size and design. You’ll have to take into account all the materials mentioned above.
If your shed is more high-end—for example, if it works as an entertainment or leisure area more than a storage space—the costs will be higher.
But overall, building a shed with a slanted roof usually costs around $3,000–$4,000.
If you’re only planning a roof replacement for your shed, the price ranges from around $150 to $750.
Check out this DIY Shed Cost Calculator to get a general idea of how much you’ll spend on your shed.
Remember to always add a 5–10% allowance to your budget. It’s better to be prepared than to be taken by surprise with all the costs of building a shed.
Building a Shed in Your Backyard
Summertime is perfect for backyard upgrades, and adding a shed can enhance your outdoor living experience. Whether it serves as a storage space or a tranquil retreat, a well-designed shed can offer a multitude of benefits.
Remember, building a shed involves careful planning and precise measurements, particularly when it comes to the roof. The roof is not just about aesthetics. Its design, material, and installation method can significantly affect the durability of your shed.
Whether you opt for a flat roof or a skillion roof, follow the right installation process and use appropriate materials.
To recap, here’s a step-by-step guide on how to build a shed with a slanted roof:
- Measure your shed’s surface area. Then, mark it accordingly.
- Lay the foundation of your shed. Make sure it’s level all throughout.
- Build your shed’s structure using the timber you have. Fasten each piece securely.
- Start laying out the rafters for your shed’s roof. It’s a slanted roof. So, all you need is to space the beams equally across the area.
- Make an angled cut on the beams. These will serve as a notch for your shed’s walls. Fasten your rafters to your shed.
- Add a layer of roofing felt to make it watertight. Make sure it’s applied securely and tightly.
- Start installing the asphalt shingles on your shed’s roof.
- Don’t forget to add a vent for your shed. This is to keep it sturdier and more durable.
Call Fortress Roofing for Your Shed Building Needs
While DIY shed-building can be a rewarding experience, not everyone has the time, tools, or confidence to undertake such a project.
If that’s the case for you, consider calling the roofing contractors at Fortress Roofing.
We have the experience and knowledge to handle all your shed building needs, from obtaining a building permit to installing the roof shingles.
Please visit our website for more information about our services, and feel free to contact us for any queries. With our help, your dream shed can become a reality!


