How to Shingle a Roof – DIY Guide for Handy Homeowners
DISCLAIMER: shingling a roof can be a dangerous and intensive project. It’s highly recommended that you contact a roofing professional to talk about your project beforehand and utilize their services if necessary.
Reroofing your house can be one of the most daunting DIY activities, especially if you are tackling the project alone.
Many people decide to reroof their homes to save money, but if the project isn’t done properly, it can be quite costly in the long run.
so before you start ripping up the old shingles on your home, it’s important to learn how to properly shingle your roof.
One of the most crucial aspects you should know about first and foremost is to avoid taking any shortcuts. Make sure that you do not compromise the quality of your work because you want to get the job done faster or cheaper.
Professional roofing contractors are accustomed to roofing works. They spend enough time to enable them to know how to maneuver their way through the structure, and carry out the works skillfully and within a relatively short period of time.
As for the typical homeowner, this is probably new territory. We have put together a guide that will show you the different steps involved in shingling your roof, as well as how to do it safely and efficiently.
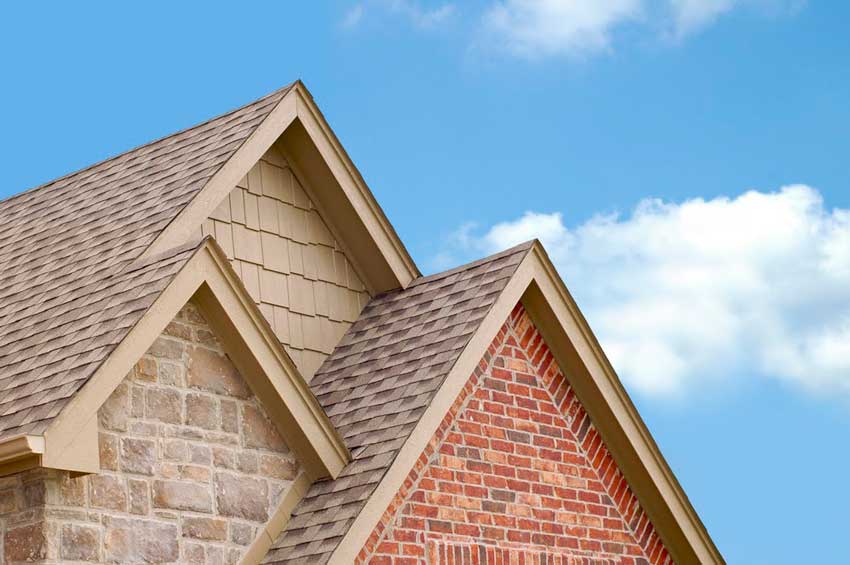
Plan your Project in Advance
Before you begin, plan the entire roofing process. Get an estimate of the amount of material you will require.
There are several online roofing calculators that you can use to estimate the area of your roof and the amount of roofing material you will need to completely cover it.
Be knowledgeable about your choice of Roofing Material
It’s crucial to be knowledgeable about which type of roofing material you are going to install on your roof.
Some of the different choices you can choose from are asphalt shingles (most popular, especially for DIY replacements), rubber shingles, and even slate shingles.
Know the options at your disposal and make a choice that best suits your needs. You can buy most roofing materials from your local home improvement store.
To keep things simple, this guide is going to cover installing laminated 3-tab asphalt shingles on your roof.
Ask a friend for help
Being a DIY homeowner does not mean you have to do it all alone. If your roof is expansive, you may become exhausted from the work, and it may take forever for you to complete it.
Look for someone to help you when push comes to shove. That could be a relative, a neighbor, or a friend. This will go a long way in saving you valuable time.
It will also make the process a little more exciting and can be a bonding experience.
So don’t be afraid to ask for help every once in a while.
Familiarize yourself with the Different Types of Roofs
Your roof can come in different styles and designs. Before you embark on shingling, it is important to know the different types that exist and determine which one yours is. Here are the most common types:
Hip Roofs
A hip roof contains four sloping sides without a flat surface. Its planes are usually of the same pitch but different sizes. All these roof planes slope downwards from the peak.
This type of roof derives its name from the point where two roof planes meet and project towards the outside.
The front and back of a hip roof are usually the major planes while the remaining two sides are relatively smaller. The walls below these planes are typical of the same size.
Gable Roofs
Unlike a hip roof, the gable type has at least one flat-faced end. This triangular "A-shaped" end is what is referred to as a gable and does not consist of any roofing material.
Instead, it is usually made of whatever material the rest of the exterior of the building is made of. It can have one, two, or more gables depending on the general design of the house.
Hip and Valley
This is a variant of the hip roof that includes valleys. Valleys are the points where two planes meet and project downwards, more like the opposite of a hip. A valley is created when two or more hip roofs are combined and joined perpendicular to each other.
The Tools You Will Need
Since you are not taking on this job as a regular trade, you really do not need to purchase the special roofing tools. You can instead borrow or rent the power specialty tools that you need to bring down the old roof and install the new one. You might as well be surprised that the arsenal of tools that are in your toolbox can help you handle much of the work.
These are the essential tools you should gather:
- Roofing hammer/ hatchet: Specialized tools intended to help the handy homeowner cut roofing shingles and drive nails into the shingles. Their unique features include gauges that help position the shingles and magnetized faces used to pick stray nails.
- Roofing Nailer (nailgun): For large roofing replacement jobs, it’s highly recommended that you buy or rent a roofing nailer to speed up the process. It’s extremely handy to know which pressures to use when installing your shingles.
- Staple gun: Staples are becoming increasingly popular tools for the handy homeowner. This is not only because they are easier to use, but also because they cost much less than nails. Budget for about 400 staples per sq. ft.; just about 3-4 of them for every 3-tab shingle. A staple gun is used to drive staples into the shingles in order to attach them to the roofing structure. It is quite handy, easy to use, and easy to repair if staples get jammed inside it.
- Staple guns can also be used to install the weatherproofing felt before the shingles are installed.
- Pry bar: This is an invaluable tool in pulling out old roofing materials, boards, and studs. It will come in handy when you are removing your old shingles to give room for the new ones. It is easy to use and saves the roofer lots of time.
- Flathead Shovel: flathead shovels can also be used to help tear off old shingles. This can be used as an alternative to the prybar.
- Forked Shovel: forked shovels are also alternative tools to use for tear off old shingles.
- Air knife: You will use this one to cut the shingles. It is less labor-intensive and easy to use by a roofing amateur. It can be used to easily slice through most roofing shingles.
- Shingle saw: This is used to cut and shape shingles into various styles. There are both handheld and mechanical variations. You should select the appropriate saw and blade for the type of shingle you have selected for your roof.
- Extension ladder: This tool either allows you to work on the roof at an angle or to get to its top. Secure it properly to prevent it from slipping sideways or falling back. Make sure the top of the ladder extends at least 3 feet above the point of contact and that the point of contact with the ground is also stable.
- Chalk Line: use this to line up the placement of your shingles around your roof.
- Level: a level can be used to determine the pitch of your roof and line up the placement of your shingles if chalk line isn’t available.
| Extension Ladder | Used to get up and down from the roof | $150 - $300 |
| Fall Protection Kit | Keeps you from falling off of the roof | $150 - $500 |
| Level | Measure the pitch and line up the placement of the shingles | $10 - $70 |
| Prybar | Used to remove tough nails struck in the roof as well as old shingles | $10 - $20 |
| Flathead Shovel | Used to remove the preexisting shingles from the roof | $15 |
| Milled Face Framing Hammer | Used to hammer in or remove nails | $30 |
| Roofing Nailer | For full roof replacements, rent or buy a roofing nailer | $150 - $300 |
| Shinglers Hatchet | Used to cut shingles | ~$60 |
| Roofing Nails | Make sure you pick the correct nails for your roof | $3.50 - $8 per 1.lb-pack |
| Tarp | Keeps the roof from getting wet in a rainstorm | ~$100 |
| Utility Knife | Used to trim and cut shingles to the proper size | $10 - $20 |
| Staple Gun | Used to install shingles if you don’t want to use a roofing nailer | $15 - $50 |
| Heavy-Duty Staples | 5000 pack of heavy-duty staples | $20 |
| Hand saw | For shaping shingles into their desired style | $10 - $40 |
| Chalk Line | Used to align shingle placement | $8 - $22 |
| Sealant | Apply sealant around areas that water can penetrate | $5 - $10 |
Step-By-Step Shingle Installation Guide
Step #1: Remove The Broken Shingles
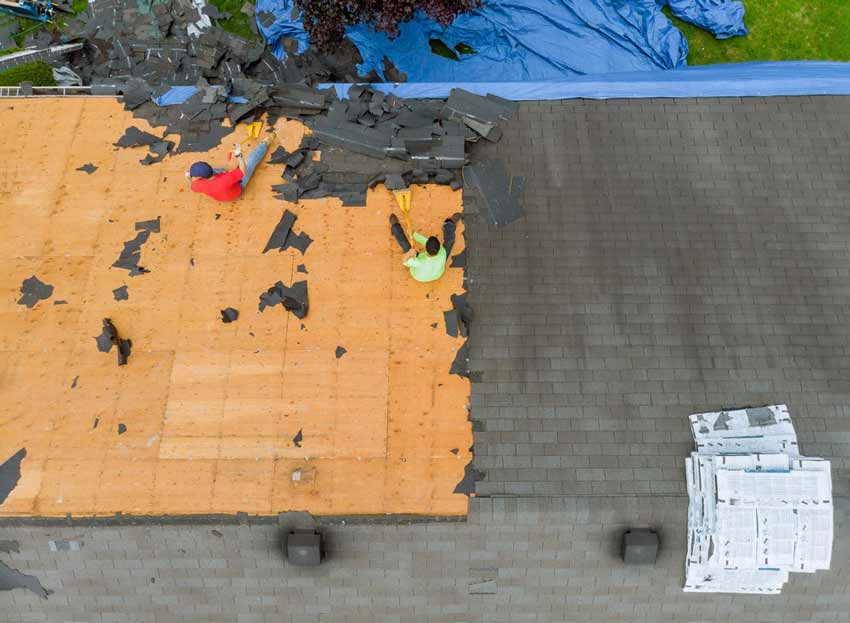
Identify which shingles need replacing and remove the old and damaged shingles one by one.
If you are replacing the entire roof, remove all the shingles and clear the entire roof by removing excess debris and dirt.
Use a flathead shovel, forked shovel, or prybar to remove the debris.
Make sure to toss all excess debris away from the home and into a trash bin.
There are several ways to take care of the debris:
- Use a tarp to cover the eavestrough and gather all of the shingles within the tarp and dispose of them in a trash bin
- Nail multiple pieces of 2x10 wood planks at an angle along the roof. Remove the shingles so that they will be caught by the piece of wood, then dispose of the debris
Step #2: Take Care of Existing Flashing
Take extra care when working next to skylights, exterior walls, chimneys, or dormers. The metal flashing that surrounds these features may need to be replaced if it’s rusted or cracking.
If the flashing is in good condition, be careful not to damage it in the roofing process.
Step Flashing
Step flashing is metal flashing that is interwoven with the pre-existing shingles on your roof. This is easy to take care of and should be preserved.
Make sure you pull any nails away from the step flashing and bend it up ever-so-slightly, just enough so that you can pull the shingles out from underneath them.
Vent Flashing
The metal flashing surrounding your vent piping should never be reused.
Use a prybar to remove the flashing so that you avoid damaging the venting pipe.
Replace the vent flashing and make sure it is sealed properly.
Valley Flashing
When removing the shingles in the valleys of your roof, you will find metal valley flashing material.
The lifespan of this material is around the same as your shingles and should be replaced during the project.
Step #3: Clean and Inspect The Roof
Make sure to clean the roof of any protruding nails, and sweep the roof to get rid of any remaining dirt or debris.
Inspect the sheathing to determine if any boards are rotted out or damaged.
If you find any broken or rotted out boarding, cut out the damaged section, and replace it with sheathing that is the same thickness as the board on your roof.
Make sure to center any of your cuts over the rafters so you can nail the new sheathing into the rafters.
Step #4: Apply The Drip Edge
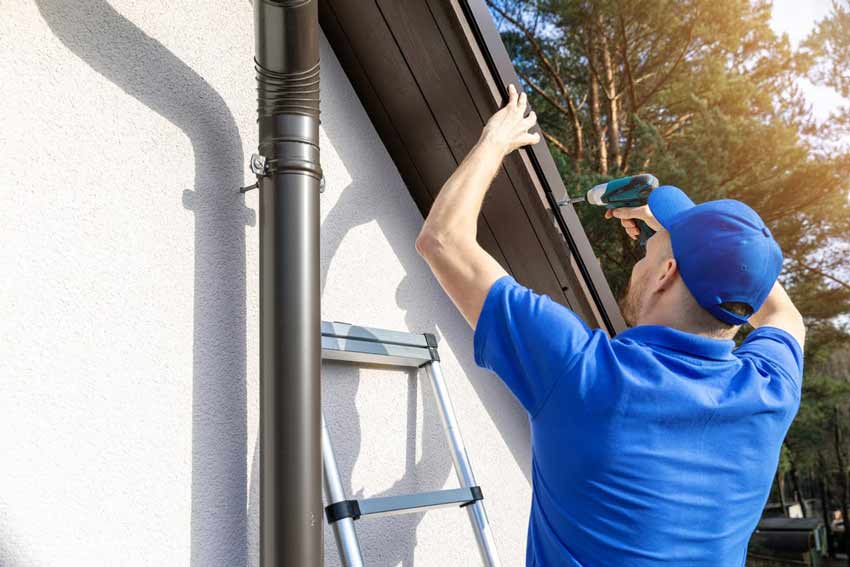
After removing your old roof, the first step is to apply the drip edge to the eaves of the roofing structure. Start from one end of the eave to the other.
Tuck down the drip edge at intervals of 10 inches using roofing nails, preferably 1-inch-long nails.
If you are placing two pieces of drip edge together, the one above should overlap over the lower one by an inch to make sure it will effectively drain water away from the fascia board and protect the underlying roofing components.
Secure these two pieces using two roofing nails; one at the back and the other at the front.
Step #5: Mark The Roof with Chalk Lines
Mark out the areas where you will lay the new shingles using your chalk line.
It is paramount that you undertake this step and pay attention closely to your markings. This will determine the aesthetic quality of your roof.
If marked improperly, your shingles will not be well arranged and this will affect the overall look of your roof.
Precisely and clearly, measure from one end of the roof to another and mark it out accurately.
Step #6: Install The Roofing Felt Underlayment
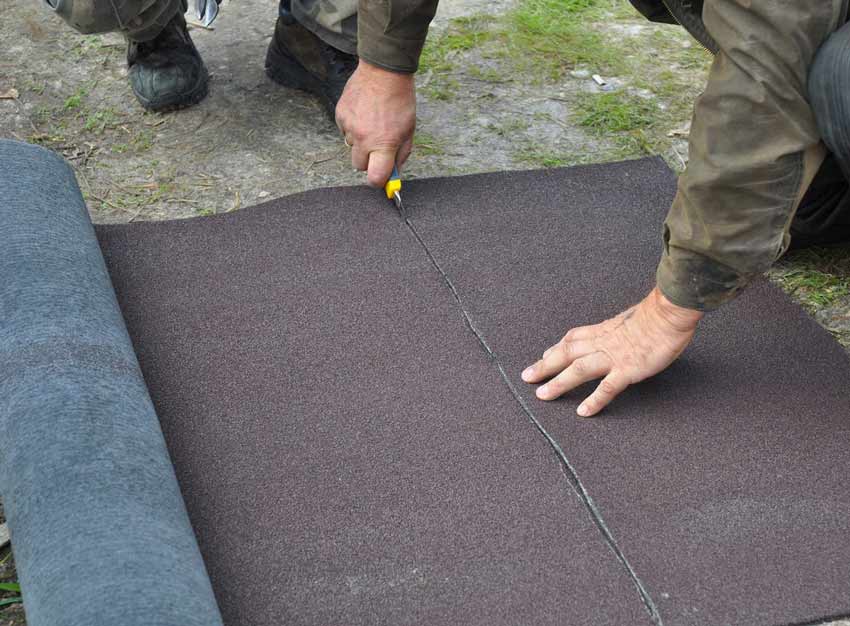
Install a layer of roofing felt on the roofing structure and secure it using your staple gun.
The roofing felt strips should slightly overlap each other.
This felt underlayment acts as the base of the shingles.
It is a very vital part of the roofing process since it prevents the penetration of moisture into the roofing structure during precipitation.
Without it, the lifespan of your roof may be shortened tremendously.
Make sure to make a chalk line 36 inches away from the edges of the eaves.
Also, make sure to cover the metal flashing for your gutters with the underlayment.
Align the felt with the chalk line, and begin tacking the top part of it with staples.
Once it is secured, lift up the felt from the bottom, and peel off the backing.
It will fall back into place and begin sticking to the roof.
This is only a temporary weatherproofing seal, make sure to finish up shingling the roof as quickly as possible once the felt is installed.
Step #7: Install The New Shingles
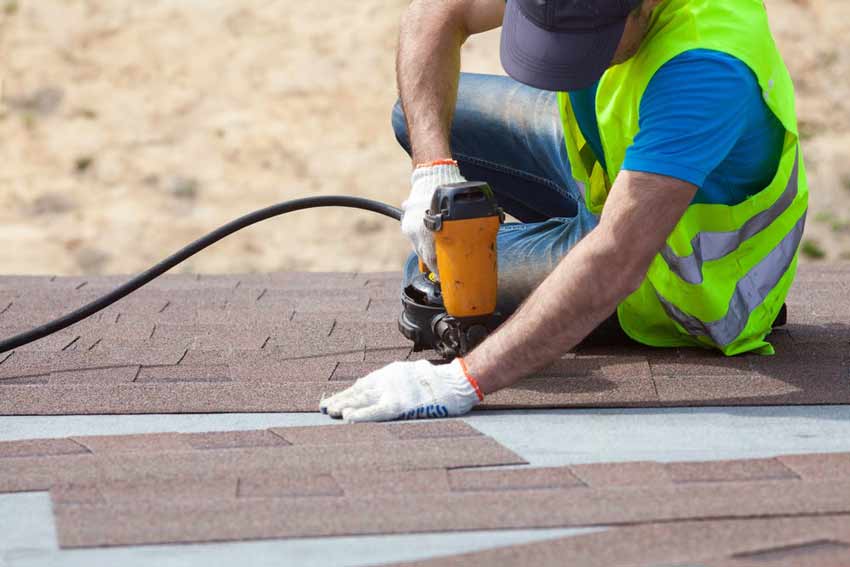
Once you have marked out the surface of the roofing felt underlayment, you will be able to determine the number of shingles required to cover the entire roof or to repair any sections on the current roof.
Get the shingles ready for installation by removing the tabs.
Start off by centering the first shingle over the chalk line-markings.
Secure this piece with roofing nails or staples on each corner.
Install the next piece just next to this shingle and repeat the process until the first row is entirely covered.
Do the same for the next row, beginning with the first piece until all the subsequent rows are covered, and eventually until the entire roof is covered.
Be very precise with your measurements, failure to which your roof will be subject to poor workmanship that may cause roofing problems in the future.
Step #8: Clean Up
Remove any excess material and properly dispose of the old broken shingles.
If left lying around your house, they will litter your lawn and pose a danger to you and other people who may slip on them.
Dispose of any roofing nails littered across the ground as well. No one wants to step on one and injure themselves!
Take Extreme Precaution Throughout Your Project
Shingling a roof is a risky affair. Taking up this task on your own calls for you to familiarize yourself with all safety measures before climbing onto the roof. This is to make sure you stay protected throughout the entire shingling process.
Here are the safety guidelines you need to follow as you work on your roof:
- Put on the right roofing attire and safety equipment.
- Be conscious of your surroundings. Are there passers-by who may be hit by falling debris? Erect proper signage to warn other people and notify them of ongoing construction works.
- Handle the roofing hammer or nail gun with care. As you strike the hammer, make sure no part of your body is anywhere close to the striking surface. Always unplug the nail gun when it's not in use. Make sure to use a firm grip so the hammer doesn’t go flying off the roof.
- Rest the ladder against a stable solid surface.
Final Thoughts
We have summarized the process of shingling a roof in 8 steps. You could be thinking, "Easy-peasy!", but do not grow complacent.
Shingling a roof is not as fast and as easy as it seems. It is quite engaging, and a simple mistake can spoil the party.
Be sure to familiarize yourself with the entire process beforehand to eliminate the slightest chance of failure.
Since it is risky and dangerous, get yourself the right tools, the correct attire, and appropriate safety gear to enable you to eliminate the dangers that come with shingling. This will help enable you to work effectively and efficiently.
If you have any questions about our DIY roofing process, leave a comment below and we will make sure to get back to you right away.
Good luck and wishing you well throughout all of your home improvement projects!


